I just wanted to thank you for being a great instructor and helping me get my licence back. Being a person with above knee amputation no one wanted to give me lessons, you took a chance on me.
The key to good driving technique is smoothness, and the secret to smoothness is good preparation.
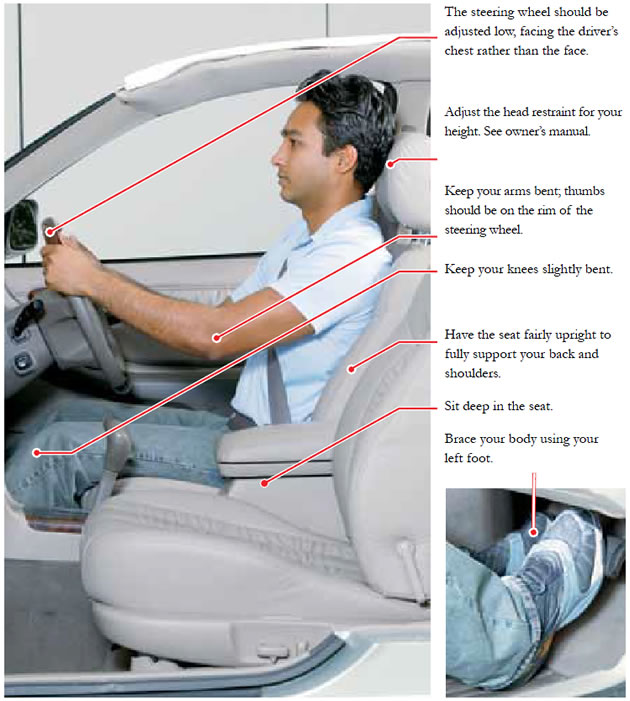
DRIVING POSTURE
When you first get a car take the time to adjust the seat and controls to suit your
height and build. Correct driving posture reduces fatigue, improves your control
and allows the safety features of the vehicle to operate effectively.
SEATBELTS
For seatbelts to work effectively they should be adjusted ‘low, flat and firm’.
• Low – placed below your hips to fully secure your body weight.
• Flat – no twists, turns or folds.
• Firm – about every 15 minutes when you drive pull the belt firm to remove any
slack.
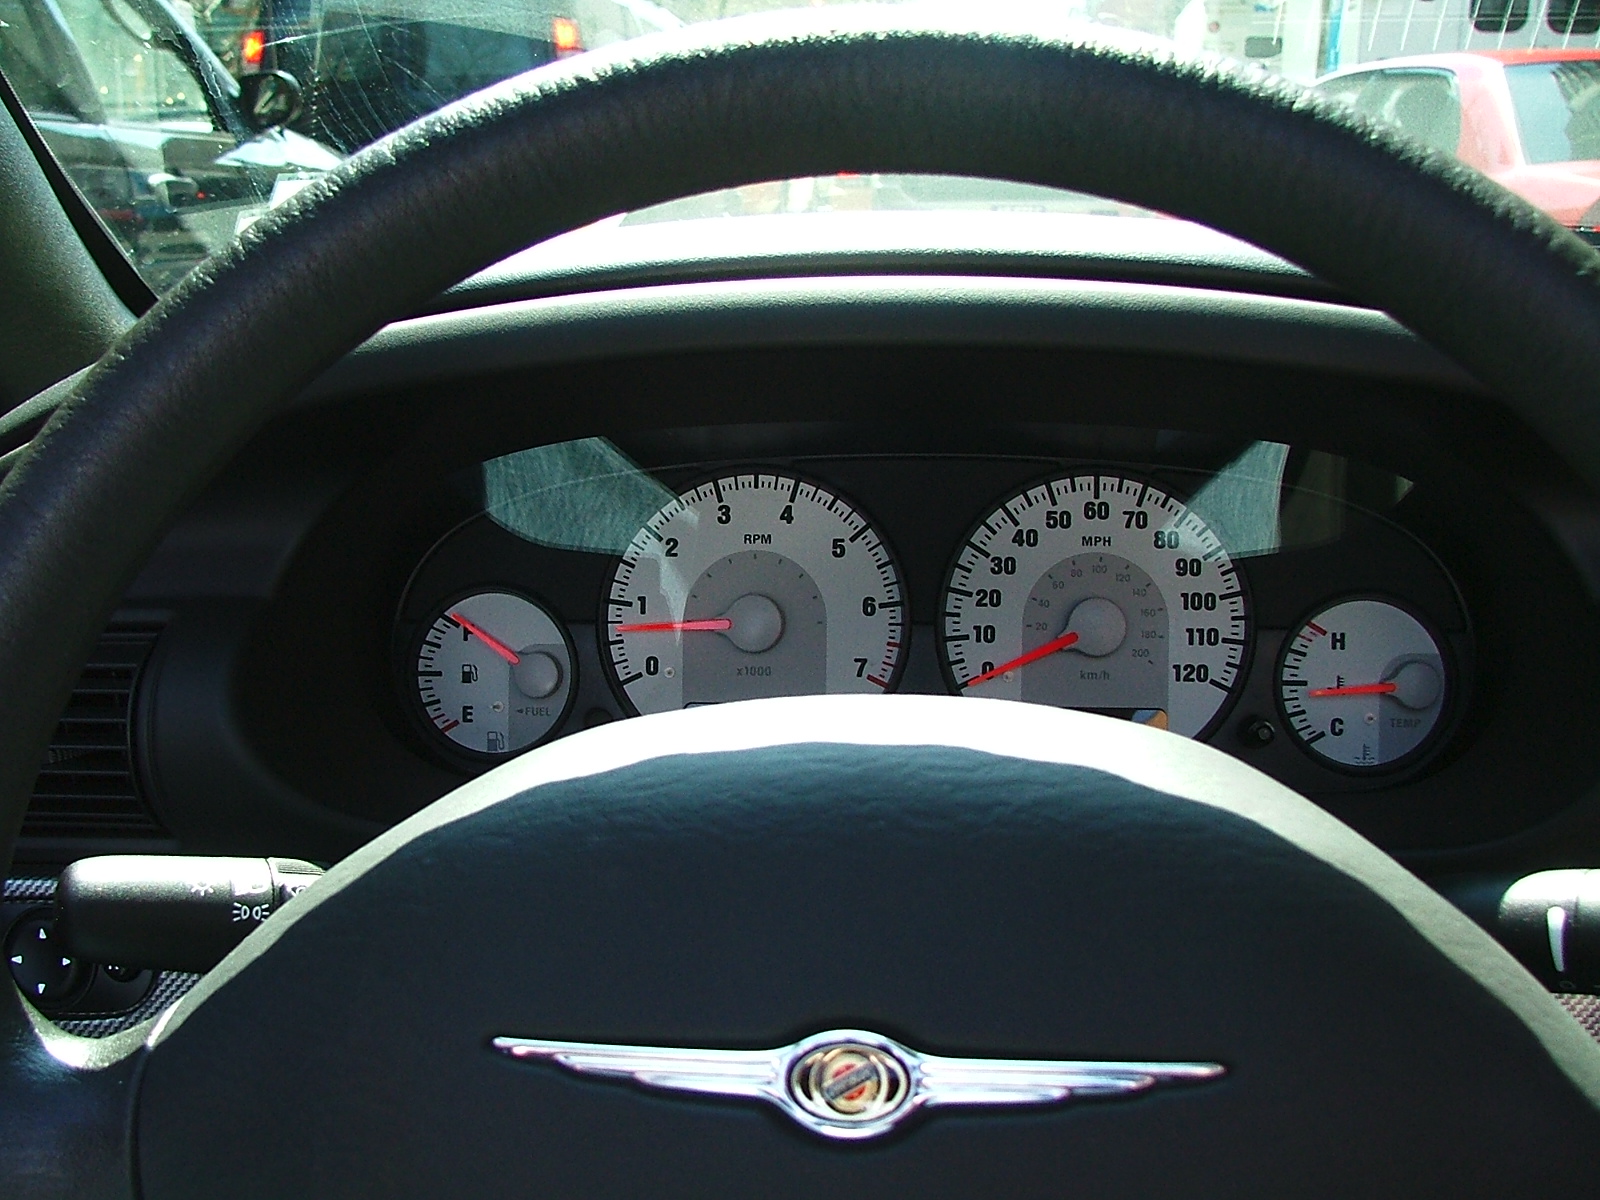
AIRBAGS
Airbags are a supplementary restraining system (SRS) designed to be used in
conjunction with seatbelts. To get the most benefit from the driver’s airbag the
steering wheel should be adjusted low, facing the driver’s chest rather than the face.
BRAKING TECHNIQUE
Correct braking is done in two stages, first put light pressure on the brake pedal
and pause (set up the brakes), then progressively apply the necessary braking
pressure (squeeze).
Two-stage braking (set up and squeeze) improves braking effectiveness, reduces
the likelihood of skidding and provides better control.
Harsh or excessive braking pressure may cause skidding and a loss of control,
particularly on wet or gravel roads.
STEERING TECHNIQUE
There are two main steering techniques, ‘push/pull’ and ‘hand over hand’.
Regardless of which method is used some general rules apply:
• Steering must be smooth and progressive.
• Reduce speed before steering and wait until the vehicle begins
to straighten before accelerating.
• When steering keep both hands on the outside of the steering wheel and
thumbs along the rim.
CRASH AVOIDANCE SPACE
A safe low risk driver maintains a crash avoidance space completely around the
vehicle. The crash avoidance space is managed by adjusting the vehicle’s speed and
road position.
To determine the crash avoidance space to the front of the vehicle you need to
take into account two key factors – reaction time and response time.
Reaction time is the time the driver needs to:
• See the information.
• Perceive what it means.
• Decide on a response.
• Instigate that response.
A driver who is fit, concentrating, alert and not affected by alcohol, drugs, fatigue
or a distraction, will still require about one and a half seconds to react to a hazard.
Response time is the time required to take action. Generally a minimum of one
and a half seconds is needed to respond. In many situations braking may be the
only possible response. Swerving is rarely appropriate and can result in a more
severe crash, for example a head-on collision.
A total of three seconds crash avoidance space is needed to react and respond to a
situation in front of you. You may need even longer in poor conditions such as in
rain or darkness.
The three-second gap, explained on the next page, can be used when following
another vehicle or if there is potential for something to move into your crash
avoidance space.
FOLLOWING ANOTHER VEHICLE
To calculate a three-second crash avoidance space when following another vehicle
use this basic technique. As the rear of the vehicle in front of you passes an object
at the side of the road such as a power pole, tree or sign, start a three-second
count ‘one thousand and one, one thousand and two, one thousand and three’.
If your car passes the object you picked before you finish the three-second count,
you are following too closely. Your crash avoidance space is not large enough. Slow
down, and repeat the count again until the three-second crash avoidance space is
achieved.
In poor driving conditions, such as rain, night and gravel roads, it may be necessary
to increase your crash avoidance space to four or more seconds.
To reduce the risk of driving into the rear of a vehicle, the three-second crash
avoidance space is essential, as the vehicle in front has the potential to stop very
quickly if it collides with another vehicle or stationary object
THE THREE SECOND GAP WILL CHANGE DEPENDING ON YOUR SPEED.
The following table shows the crash avoidance space needed for these speeds
Speed Crash avoidance space
60 km/h 50 metres
80 km/h 67 metres
100 km/h 84 metres
110 km/h 92 metres POTENTIAL FOR SOMETHING TO MOVE INTO THE CRASH AVOIDANCE SPACE
The three-second gap can also be used for situations where there is potential
for something to move into your crash avoidance space; for example a car in an
adjacent street could fail to give way and pull out in front of you.
Safe low risk drivers experienced in maintaining a three-second following distance
are able to mentally judge a three-second crash avoidance space in front of their
vehicle. If there is potential for a hazard to enter this crash avoidance space, reduce
your speed to create a buffer. It is necessary to maintain the crash avoidance space
for all potentially hazardous situations, including blind corners and crests.
Many of the crashes that occur each day in NSW could be avoided if drivers
actively maintained their crash avoidance space.
Low risk driving
Driving is never risk free, but you should aim to drive ‘low risk’. A low risk driver has good observation, speed management and road positioning skills. OBSERVATION
The key to good observation is scanning.
Scanning is keeping your eyes moving, checking in one area for a couple of
seconds and then moving your eye to another area.
When scanning look:
• In the distance.
• At the road surface.
• To your left and right.
• Regularly at your mirrors and instruments. SPEED MANAGEMENT
Drive at a speed that is within the speed limit and this will allow you to react and completely stop within the distance you can see is clear. When you see potential
hazards, slow down and prepare to stop (referred to as setting up the brakes), for
example when pedestrians are close to the road or when other vehicles may turn in
front of you. If you cannot see at least five seconds ahead you must slow down.
Slow down on wet, icy or gravel roads where it will take longer for your vehicle to
stop.
Your ability to control the vehicle is assessed by the way you handle the tasks involved.
OPERATING THE CONTROLS
Some of the driving tasks that the testing officer will observe and record are
listed here:
Adjust driver’s seat posture and steering column (if adjustable) to ensure you have good control of the vehicle.
Operate accelerator smoothly when accelerating and decelerating.
Operate brakes smoothly and effectively.
Coordinate clutch and gear lever to make smooth gear changes.
Select appropriate gear for the situation including when coming to a stop and parking the car.
Avoid over-revving on take off and gear changes.
Driver’s seat belt is correctly fastened, fitted and adjusted (low, flat and firm).
Apply a brake when starting the vehicle.
Prevent rolling back when starting on hills.
Use park brake correctly when preparing to secure the vehicle and ensure it is fully released when driving.
Steer with both hands on the steering wheel (except when using another control), using either ‘hand-over-hand’ or ‘pull-push’ method with hands on the outside of the steering wheel.
Use other controls such as indicators, windscreen wipers and demisters.
You must be confident in your use of all controls and be able to operate them without being distracted.
Low risk driving is consciously choosing to apply driving behaviours that can significantly reduce the risk of crashing.
Learning Goals.
Speed management
Road positioning
Decision making
Responding to hazards
Where To Go
At this stage it is important to include a wide variety of learning environments. Remember however, that as new skills are taught it may be better to begin in a quieter environment and then increase traffic volume as confidence grows. Try to:
– Use a wide range of environments
– Continue to use back streets as many hazards are still present {eg small children}
– If you haven’t done so already, start to venture into some unfamiliar environments.